
You’ve been squatting for a while now, haven’t you?
You’ve mastered the basic movement, added some weight, and you’re seeing progress.
But you’re after more.
You’re not just content with ‘good enough’.
You are looking for game-changing results, for that extra edge that will make all the difference.
You’re ready to take your squat game to the next level.
And guess what?
You’ve come to the right place.
Here, we’re going to dig deeper into achieving a better squat, beyond the basics.
We’ll explore the subtle adjustments and tweaks that can transform your squat from good to great.
We’ll talk about stance, bar position, depth, flexibility, head position, accessory movements, footwear, and how to track your progress.
You’re not just going to learn how to squat better; you’re going to learn how to squat smarter.
So, let’s get started, shall we?
It’s time to revolutionize your squat.
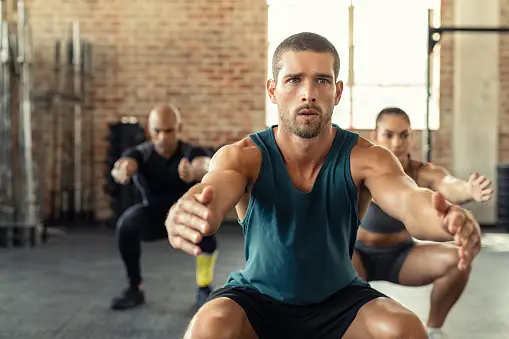
#1.The Foundation: Proper Stance and Foot Placement
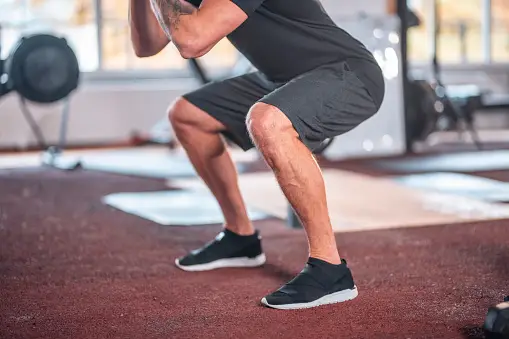
Perfecting your stance and foot placement is the bedrock to nailing that game-changing squat.
Think of it as the foundation of a house: without it, everything else crumbles.
The key to mastering the squat lies in your ability to maintain the proper squat form throughout the movement.
This starts with understanding your body’s unique mechanics, which directly influence where your feet should be and how they should be angled.
As you begin to experiment, keep an eye out for common mistakes, such as heels lifting off the ground or knees caving in. These are clear indicators that adjustments are needed.
Progress in the world of fitness is often synonymous with innovation. Just as technology continues to evolve, so too should your squat form.
When setting up your stance, think outside the box. You’ve probably been told that your feet should be shoulder-width apart.
While this is a good general rule, it doesn’t account for individual differences in hip structure. Play around with the width of your stance until you find a position that allows you to squat deeper, while keeping your feet flat on the ground.
Remember, the foundation: proper stance and foot placement is not a one-size-fits-all solution.
So, you’ve found your sweet spot? Great! Now, let’s focus on maintaining it.
The beauty of mastering the squat is that it’s a continuous journey of self-improvement. Keep checking in with your body and making necessary tweaks along the way.
A slight outward turn of the feet, for instance, can make a world of difference in engaging your hip muscles more effectively.
And remember, it’s not about how heavy you can squat, but how well you can keep that proper squat form under heavy loads.
So go ahead, give it a shot. The power to revolutionize your squat form is in your hands, or rather, in your feet.
#2. Core Activation: The Powerhouse of A Better Squat
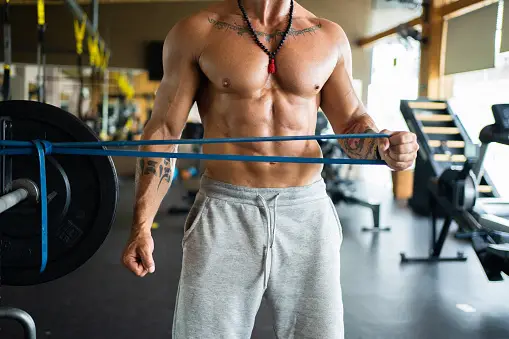
Unleashing the full potential of your squats begins with activating your core, the powerhouse that fuels every rep. Core activation is a key element in mastering the squat, enabling you to maintain form and control throughout each movement.
It’s not just about the legs and glutes – your core is the central force, providing stability and balance, preventing injuries, and driving power from the ground up.
It’s the secret sauce that can shift your strength training from ordinary to extraordinary.
To squat correctly, you need to engage your core as if you’re preparing to take a punch in the gut. Now, imagine a string pulling your belly button towards your spine, this is what we call ‘bracing’.
Bracing your core is like turning on the engine of a powerful sports car, it sets everything in motion.
When squatting, whether it’s a bodyweight squat or with a loaded barbell, remember to brace your core before you descend.
This ensures your back stays neutral, your spine is protected, and your body can properly absorb and transfer force.
But mastering the squat doesn’t stop at core activation. It’s about continually rethinking and tweaking your form, exploring new depths, adjusting your foot placement, and challenging yourself with added weight or volume. Every squat is an opportunity to innovate and improve.
So, the next time you step into the squat rack, remember: your core is your powerhouse. Activate it, brace it, and let it drive each rep. You’re not just squatting, you’re engineering a stronger, more resilient body.
#3. Bar Position: High Bar vs. Low Bar Squats
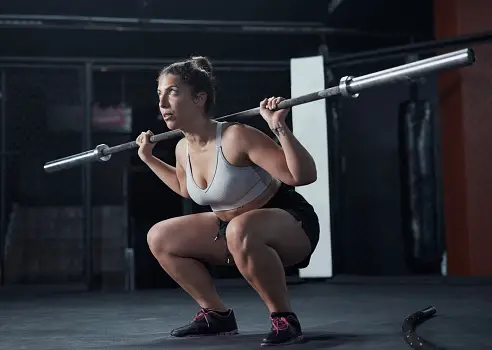
So, you’ve got your core activation down, but have you considered the impact of bar placement on your squats? Bar position: high bar vs. low bar squats is a game-changer in mastering the squat: 10 essential adjustments for dramatic results.
The position of the bar on your back significantly impacts your squat form, depth, and the muscles you’re targeting.
The high bar position rests on your traps, just below the neck, forcing you to stay more upright, which places more emphasis on your quads.
On the other hand, the low bar position sits just below your shoulder blades, allowing you to lean forward more and target your posterior chain, including your glutes and hamstrings.
Understanding the difference between these two squat variations is key to tailoring your workout to your specific goals.
Experimenting with the high bar and low bar positions can help you diversify your training and overcome plateaus.
If you’re looking to build muscle in your lower body, alternating between the two positions can lead to comprehensive muscular development.
For instance, bodyweight squats are a good starting point, but adding barbell squats to your routine with varying bar positions can significantly boost your strength and muscle growth.
It’s not about which position is better, but about using both strategically to maximize your results.
Let’s not forget, proper bar positioning also ensures you’re lifting safely, minimizing the risk of injury. It’s all about balance and alignment.
If the bar is too high, you might strain your neck or lose balance. If it’s too low, you might put undue strain on your lower back.
So, remember to adjust the bar position according to what feels comfortable and safe for you. It might take some getting used to, but it’s a small adjustment that can bring about game-changing results in your squat performance.
#4. Depth Matters: Finding the Perfect Squat Depth for You
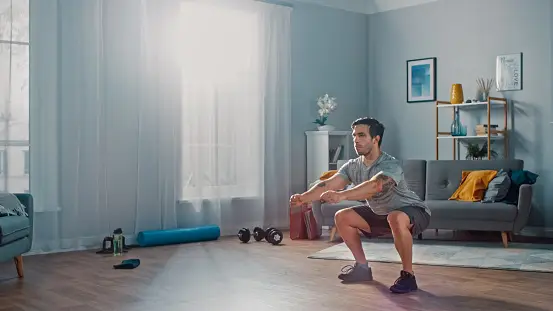
Diving deep isn’t just for the pool, it’s crucial in your workout routine too, particularly when we’re talking about finding the perfect depth for your squats. This isn’t as simple as going as low as possible.
Squats are not a one-size-fits-all exercise and your ideal depth will depend on a multitude of factors, including your joint mobility, flexibility, and strength.
The goblet squat, for instance, allows you to hold a weight in front of your chest and lower your body until the elbows touch the knees. This movement pattern can help you figure out your optimal squat depth while enhancing your hip mobility.
Now let’s talk about mobility. Ankle mobility is a key factor when we’re discussing squat depth. The ability to flex your ankle allows you to maintain balance and drive force through the heels, which is essential for successful squatting.
Not only does this ensure your safety during the exercise, but it also determines how low you can squat without compromising your form.
To improve ankle mobility, you can perform exercises such as calf stretches and ankle rotations.
On the other hand, hip mobility plays a huge role in squat depth as well. The overhead squat, a popular CrossFit movement, requires a great deal of hip mobility and stability.
It involves holding a barbell or a pair of dumbbells overhead while you squat. This exercise, while challenging, can drastically improve hip flexibility and stability, facilitating a deeper, more effective squat.
So, as you can see, finding the perfect squat depth isn’t just about going low. It’s about understanding your body’s limitations, working towards improving your mobility, and adjusting your squat technique for optimal performance.
#5. The Role of Mobility: Ankle and Hip Flexibility

Understanding your body’s unique limitations, particularly in terms of ankle and hip flexibility, can significantly improve your workout performance and prevent potential injuries. You see, in the world of squats, the role of mobility is often overlooked.
However, flexibility in your ankles and hips can make a world of difference when it comes to executing a perfect squat.
Limited mobility in these areas can lead to improper form, decreased depth, and even injury. So, it’s time to give these joints the attention they deserve and revolutionize your squat game.
Imagine a world where every squat feels effortless and powerful. That’s the world you’ll inhabit when you prioritize ankle and hip flexibility. How do you achieve this, you might wonder? Simple, by incorporating specific mobility exercises into your workout routine.
For instance, ankle dorsiflexion exercises can help increase your range of motion, allowing you to descend deeper into your squats.
On the other hand, hip mobility exercises can enhance your ability to maintain proper posture throughout the movement. This innovative approach to your workout regimen is not only beneficial for your squat performance but also promotes overall body health.
But hey, let’s not stop there. Let’s talk about the long-term benefits. Consistently prioritizing ankle and hip mobility can lead to improved body alignment, better athletic performance, and reduced risk of injury.
So, while it may seem like just another part of your workout routine, this focus on mobility can act as a game-changer, providing you with a sustainable advantage in your fitness journey.
Remember, mastering the squat isn’t just about strength or power—it’s also about flexibility and movement. So go on, give your ankles and hips the love they deserve, and watch your squat performance transform.
#6. Breathing and Bracing: Powering Through Your Lift

Believe it or not, the breath you take before lifting that heavy weight can be your secret weapon, energizing your muscles, steadying your focus, and skyrocketing your performance to unbelievable heights.
The power of a deep, controlled breath can contribute towards a game-changing squat by providing the necessary stability your body needs.
You see, when you breathe in deeply and hold it, you’re creating intra-abdominal pressure, a sort of natural weightlifting belt that braces your spine. This process, known as the Valsalva Maneuver, is a technique you might not have considered but it’s one that can transform your squats immensely.
Now, let’s delve deeper into the concept of bracing, another critical element for mastering your squat.
Bracing is more than just sucking in your gut or flexing your abs, it’s about engaging your entire core to create a solid, unyielding column of support from your hips to your shoulders.
To brace effectively, imagine you’re about to take a punch to the gut, your natural reaction is to tense up and protect your midsection, that’s exactly the type of tension you need to maintain throughout your squat.
It’s a game-changing habit that enhances your stability, prevents injury, and increases the power you can generate during your lift.
So, to make the most of your squats, remember to incorporate proper breathing and bracing techniques.
Breath control can provide the stability and power necessary for a successful lift, while bracing ensures your core is engaged and ready to support the heavy weight.
It may seem like a lot to remember, but with practice, these adjustments will become second nature.
And remember, every breath you take and every move you make plays a colossal role in your squatting journey.
Now, go out there and squat like a champion!
#7. Eyes on the Horizon: The Importance of Head Position
Ever thought about where you’re looking when you’re lifting those heavy weights? If not, it’s high time you did.
The position of your head during a squat can make a significant difference to your form, balance, and power.
When you’re performing a squat, it’s essential to keep your gaze fixed straight ahead, at a point on the horizon. This helps to maintain a neutral spine and ensures you’re not straining your neck.
But, why does this matter, you might ask? Well, maintaining a neutral spine during a squat is the key to preventing injury and promoting a more efficient lift.
When you tilt your head up or down, it can cause your back to round or arch, placing undue stress on your spine. This can limit the amount of weight you’re able to lift, and worse, it can lead to serious injury.
So, keep your eyes on the horizon and your head in a neutral position. This simple adjustment could transform your squatting performance.
So, next time you’re under the bar, don’t just focus on lifting the weight.
Pay attention to where you’re looking. Remember, every detail matters when it comes to mastering the squat. Your head position is a game-changer. It could be the difference between a good lift and a great one.
So keep your eyes on the horizon, your head neutral, and watch your squat game soar to new heights.
#8. Accessory Movements: Exercises to Complement Your Squat Game
After you’ve nailed down the optimal head position to maintain balance and keep your squat form pristine, it’s time to kick things up a notch. Sure, the squat is a fantastic exercise in its own right, but it doesn’t exist in a vacuum.
You’re not just squatting for the sake of squatting, right? You want to build overall strength, improve your athletic performance, or sculpt a killer lower body. And to reach those goals, you need to incorporate some accessory movements into your training.
Now, don’t get confused here. Accessory movements aren’t meant to replace your squats.
Instead, they’re exercises that complement your squat game, targeting the same muscles in different ways or strengthening the supporting muscles that help you squat better.
Think of them as the sidekicks to your squat superhero: they may not get the spotlight, but they’re essential for boosting your performance.
For instance, lunges and step-ups can help improve your single-leg strength and balance, while glute bridges and hamstring curls can enhance your posterior chain strength.
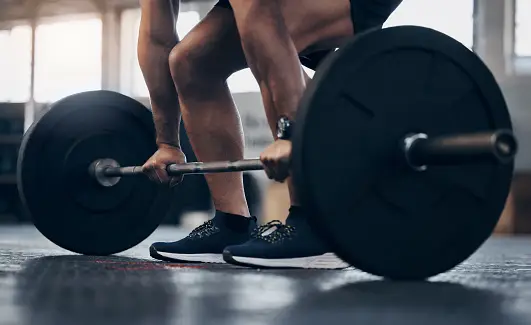
Deadlifts, another powerhouse movement, work wonders for your hip hinge—a crucial component of a strong squat.
So, how do you incorporate these into your routine? It’s all about balance and smart programming. You’re not going to jump straight into a heavy deadlift after a grueling set of squats. Instead, plan your accessory movements on non-squatting days or at the end of your squat sessions, when your legs are already warmed up.
Start with lighter weights and focus more on the quality of movement than the quantity of weight lifted. Remember, the goal here isn’t to set PRs in these exercises but to enhance your squat performance and overall strength.
So don’t rush it—let these sidekicks do their job, and you’ll soon see your squat game reaching new heights.
#9. Footwear Fundamentals: The Right Shoes for the Job
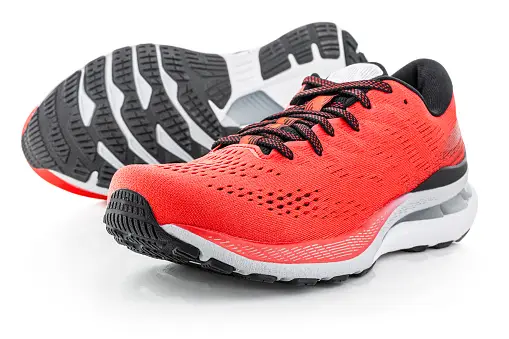
Shifting gears a bit, let’s delve into the topic of footwear and how the right pair can significantly impact your workout efficiency and safety. You might think that any pair of gym shoes will do the trick, but you’d be mistaken.
When it comes to squatting, the right shoes can make a world of difference. They can provide the necessary support, stability, and connection to the ground that you need to perform this powerful compound movement.
With the right shoes, you can push through the ground with more force, helping you lift heavier weights while reducing your risk of injury.
Think of it this way: would you attempt to run a marathon in flip-flops? Of course not! Just as running requires shoes designed for that purpose, squatting needs its own specialized footwear.
For starters, you’ll want shoes with a hard, flat sole to help you maintain stability and balance while lifting heavy weights.
Some athletes prefer shoes with a slight heel lift to enhance their squat depth and form. But remember, innovation isn’t about following the crowd; it’s about finding what works best for you and your individual needs.
So, don’t underestimate the power of the right footwear in your squat game. You’ve got the knowledge, the drive, and the ambition – now it’s time to step into the right pair of shoes.
This small adjustment could make a monumental difference in your performance and results. Remember, every detail counts when you’re striving for greatness and pushing the boundaries of what’s possible.
#10. Tracking Progress: Logging, Feedback, and Consistent Adjustments
![]()
Now, let’s dive into how you can keep track of your progress with logging, feedback, and consistent tweaks to your routine. You want to become a master at squatting, right? Well, you can’t improve what you don’t measure.
Start by keeping a workout log. Each time you hit the gym, jot down your squat form, number of sets, reps, weight used, and how the workout felt overall. You might even want to note what you ate before your workout or how you slept the night before.
Over time, you’ll spot patterns that can help you fine-tune your approach. Remember, it’s all about the details.
Feedback, both from yourself and others, is also crucial. Try filming yourself performing the squat. Watching the footage will give you a new perspective on your form and highlight any issues. And don’t be afraid to ask for feedback from trainers or other gym-goers.
They might spot something you’ve missed. You could also consider using a fitness app that provides real-time feedback on your form and technique. Innovative tech like this can be a real game-changer.
Consistently making adjustments to your routine is the final piece of the puzzle. You might find that certain tweaks lead to better results.
For example, changing up your foot placement or the depth of your squat could lead to significant improvements.
Or perhaps you find that squatting first thing in the morning gives you a boost for the rest of the day. Keep experimenting and refining your routine, based on the feedback and data you’re gathering. That’s the beauty of this process – it’s all about continuous improvement and innovation. You’re not just mastering the squat; you’re mastering a whole new approach to fitness.
Conclusion
So, you’ve got all the tools now to master the squat. Remember, it’s all about finding what works best for you, from bar position to foot placement. Don’t forget to activate your core and keep your eyes on the horizon.
Including accessory movements and wearing the right shoes can also make a big difference. And, of course, track your progress and make consistent adjustments.
With these tips, you’ll be squatting like a pro in no time.
About the Author
Arman Eckelbarger is an IFBB Pro Bodybuilder and a Certified Personal Trainer dedicated to empowering others with his age management and wellness expertise. Winner of the 2019-20 Master’s Nationals Over 50 Welterweight, Arman proves that age is just a number in achieving fitness goals. He lives by his wellness principles and inspires others to reclaim their vitality for a healthier and fulfilling life.


No Comments
Leave a comment Cancel